A bent headphone jack can be a frustrating issue for anyone who relies on their headphones for entertainment, work, or communication. Fortunately, it is possible to fix a bent headphone jack at home, without the need for specialized tools or professional assistance.
In this guide, we will walk you through the steps for fixing a bent headphone jack, as well as some important considerations to keep in mind when attempting this repair. We will also provide some additional information on the causes of a bent headphone jack, and how to prevent this issue from happening in the future.
How to Fix a Bent Headphone Jack
Step 1: Gather Your Tools and Supplies
Before you begin, you will need to gather the tools and supplies that you will need for this repair. Here is a list of what you will need:
- A pair of needle-nose pliers or tweezers
- A small flathead screwdriver or knife
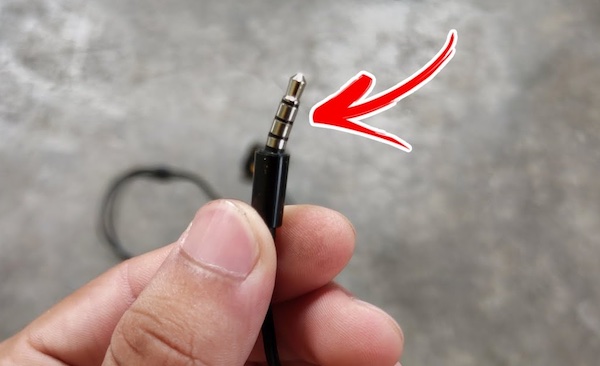
- A pair of headphones with a bent jack
- Once you have everything you need, you can proceed to the next step.
Step 2: Carefully Remove the Jack from the Headphones
The next step is to remove the screws that hold the headphone jack in place. This is typically located on the back of the headphones, near the jack itself. Use the screwdriver to carefully loosen and remove the screws. Be careful not to strip the screws or damage the headphones in the process.
With the screws removed, you will need to use your needle-nose pliers or tweezers to gently grasp the jack and pull it out from the headphone body.
If the jack is stuck or difficult to remove, you may need to use your flathead screwdriver or knife to gently pry it out. Be careful not to apply too much force, as this could damage the jack or the headphones.
Once you have successfully removed the jack from the headphones, you can proceed to the next step.
Step 3: Clean the Jack
Before attempting to straighten the jack, it is important to clean it thoroughly. This will remove any debris or dirt that may be preventing the jack from fitting properly into the headphone port.
To clean the jack, first use a soft cloth or toothbrush to gently remove any visible dirt or debris. You can also use a small amount of rubbing alcohol on the cloth to help remove any stubborn grime.
Step 4: Straighten the Jack
Once the jack is clean, it is time to straighten it using a tool. There are several tools that can be used for this purpose, including pliers, a flathead screwdriver, or a pair of needle-nose pliers.
To straighten the jack using pliers, grip the jack firmly with the pliers and gently apply pressure to straighten it. Be careful not to apply too much pressure, as this can damage the jack.
To straighten the jack using a flathead screwdriver, insert the flat end of the screwdriver into the jack and gently twist it back and forth to straighten the jack. Again, be careful not to apply too much pressure.
Step 5: Reassemble the headphones
Once the jack has been straightened and cleaned, it is time to reassemble the headphones. Carefully replace the jack into the headphones and secure it in place with the screws. Be sure to tighten the screws evenly and not overtighten them, as this can cause damage to the headphones.
Step 6: Test the Headphones
Once you have straightened the jack, it is important to test the headphones to ensure that they are working properly. To do this, simply plug the headphones into a device and try using them to listen to music or other audio.
If the headphones are not working properly, you may need to repeat the steps above or try using a different tool to straighten the jack.
Tips to Maintain Your Headphone Jack
The headphone jack is an essential component of your headphones, allowing you to connect them to various devices for listening to music, watching videos, and more.
However, it’s also a delicate part that can easily become damaged if not properly maintained. In this guide, we’ll cover some key tips and techniques for keeping your headphone jack in good working condition.
Keep it clean
One of the most important things you can do to maintain your headphone jack is to keep it clean. Over time, dirt, grime, and other debris can build up in the jack, causing it to malfunction or become damaged.
To clean your headphone jack, use a soft, dry cloth to gently wipe away any debris that may be present. You can also use a small brush or toothpick to carefully remove any stubborn dirt or grime.
Avoid moisture
Another important thing to keep in mind when maintaining your headphone jack is to avoid exposing it to moisture. Water and other liquids can easily seep into the jack, causing corrosion and damaging the delicate internal components.
To avoid moisture damage, always make sure to keep your headphones and the jack dry, and avoid using them in damp or wet environments.
Handle with care
It’s also important to handle your headphone jack with care to avoid damaging it. When inserting or removing the jack from your device, be gentle and avoid forcing it in or pulling it out.
You should also avoid twisting or bending the jack, as this can cause damage to the headphone internal connections. Instead, use a gentle, straight-in motion to insert and remove the jack.
Avoid debris
In addition to keeping the jack clean, it’s also important to avoid introducing debris into the jack. This can include things like lint, dust, and other small particles that can get caught in the jack and cause damage.
To prevent this, always make sure to keep your headphones and the jack clean and free of debris, and avoid using them in dusty or dirty environments.
Wrapping Up
In conclusion, fixing a bent headphone jack can be easily done at home with the right tools and knowledge. The steps include carefully examining the jack, straightening it with a pair of pliers, cleaning it with a cotton swab and alcohol, and testing it with a device.
With patience and attention to detail, the bent headphone jack can be successfully repaired and continue to provide high-quality audio.


