A sound dropout can happen on any TV regardless of the brand or model, so a sound problem on your Samsung TV shouldn’t come as a surprise or be a reason for panic.
There are many ways to check and correct a sound problem which could include performing a sound test, checking the ports and connectivity of your TV should be the next step in order to hunt down and correct the issue.
Samsung TV Sound Not Working: How to Fix
1. Perform a Sound Test
- On the remote control, press the Menu or Home button.
- Select Device Care. Note: On some models select Support instead.
- Select Self Diagnosis.
- Select Start Sound Test to check the sound.
To check the sound, the Sound Test will play a melody to help determine if there is an issue with the TV speakers. If the melody plays without issue, then the issue might be with the connected external device. Check the connection to confirm.
After the test, you might want to reset the sound settings. To do so;
- Open Settings, and select Sound.
- Select Expert Settings, and then select Reset Sound.
- Select Yes to confirm.
2. Update your TV’s firmware
Check if your TV firmware is updated. If you find a new firmware for the TV, install it. After that, check the sound. If the sound appears, then the problem is solved. If not, then you should move on to the next recommendation.
There are two ways to update the software on your TV
- You can download the firmware from the Support section of the Samsung website, save it to a USB drive, and then update the firmware.
- Connect your TV to the internet and check for available updates through the TV settings.
Download and Update the TV with a USB
- Go to Support section > Select your Product model > Go to Manual and Downloads section (Ensure you’re in the Manual and Software Downloads section of the country your TV was purchased from when you search for your TV model.
- Download the file Upgrade File(USB type) and save it to your desktop
- Extract the downloaded .zip file. Make sure not to change the name of the folder. @ folders will be extracted; the zip folder and a folder with the same name with the extracted Update file in it.
- Save the extracted folder to a USB flash drive and follow the file path; USB ROOT > T-KTSUABC (Firmware Name) > IMAGE > upgrade.msd
- Turn the TV on, and plug the USB into the back of the TV or One Connect Box
- Open the Settings of the TV and follow the appropriate menu path:
- (Year) Models – Settings > Support > Software Update > Update Now
- You’ll be prompted to allow the TV to search the USB drive for firmware updates. Select Yes to continue.
Download and Update the TV with Internet directly (For Smart TV)
The directions for this will depend on the TV model. You can check your TV manual for directions depending on the year of your model.
3. Reset TV settings
A factory reset will return the TV to its factory state and clear errors. After setting including the picture and sound settings, channel menu settings, clock, and timer settings, and other settings will revert to the factory default. You might choose to reset one of the settings (just the sound setting alone) but you might want to reset the entire TV to ensure you clear out every problem.
For old series (E, F, H, and J Series )
- Press the MENU button on your remote.
- Select Support.
- Select Self Diagnosis.
- Select Reset.
- Enter your TV PIN.
- The factory reset screen will appear displaying a warning message. Select Yes using the navigation buttons on the remote, and then press Enter.
For new series (K, M, N, and R series )
- Press the Home button on the TV remote control and then select Settings.
- Select Support.
- Select Self Diagnosis.
- Select Reset.
- Enter your TV PIN.
- The factory reset screen will appear displaying a warning message. Select Yes using the navigation buttons on the remote, and then press Enter.
4. Check if headphones are connected
If you connect headphones to your TV and you can’t get sound, then you might want to unplug the headphones. Check if the sound appears. If so, then the TV is working fine. If not, then you can move to the next recommendation
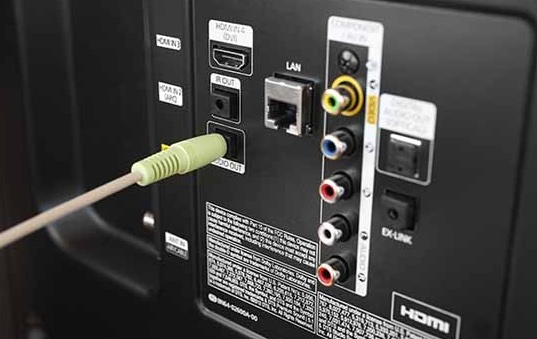
5. Disconnect and reconnect the cable leading to the external device
If your TV fails to produce sound after connecting an external device, you should disconnect and reconnect the cable leading to the external device to see if it solves the problem. Loose connections can cause dropouts so you should confirm that the cable is well connected at both ends. You should try to use a new cable if the problem persists.
You might also want to try a different port on the port.
6. Test the HDMI cable
Sometimes the problem could be due to a bad HDMI cable. You can check if the HDMI cable is bad by performing a HDMI test. Unfortunately, not all TVs have this feature. If you’re using an older model, you’re less likely to find it. Keep in mind that the test is designed for HDMI cords less than 2 meters and may not give accurate results on longer cords. Also, it won’t work on a soundbar or home theater system and is only designed for devices which include a video signal.
To perform the test, make sure the TV’s source is still on the HDMI setting for the cable you want to test. After that, navigate to Settings > Support > Self Diagnosis > Signal Information > HMDI Cable Test > Start Test.
If the test says the cable is bad, then you will have to replace the cable.


