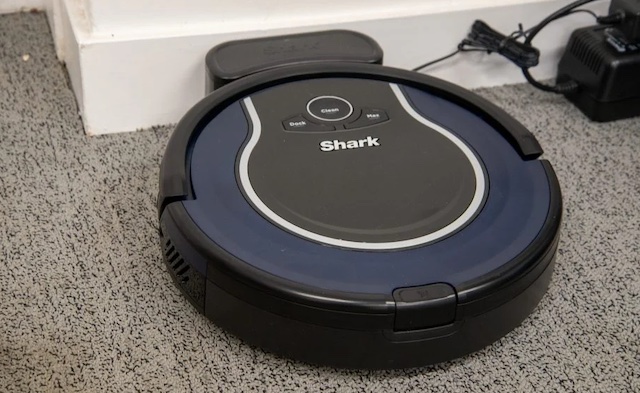
The shark robot vacuum is designed to keep you busy with other things while it saves you the stress of keeping your home clean, but it can be quite annoying when you wake up in the morning to find that your vacuum didn’t charge. You might have to set it up to charge or take up your regular vacuum cleaner and get to work.
Shark Robot Vacuum Not Charging: How to Fix
Now, we are going to share some troubleshooting tips that can help solve your Shark Robot’s charging problem.
1. Test the Outlet
You might want to think that there is something wrong with the battery or the vacuum itself, however, the problem is not always with the device. You should get started by checking the power source. Turning on the switch is one thing and even if you see the vacuum charging before you go to bed, a faulty outlet could stop working later on or not provide enough power to charge the vacuum.
This should be the first thing to do when you notice that the vacuum doesn’t hold a charge. Plug a lamp or another device into the same outlet to see if it charges. In addition, plug the vacuum charger into a different outlet. If the vacuum doesn’t work or the lamp does charge in the previous outlet, then you know that there is a problem with the vacuum or one of its components.
2. Check the Vacuum
If the vacuum is broken, it might not be able to charge properly. You should test the vacuum to see if it is functioning properly. If you notice that the suction is strong and it still maintains its efficiency, then you could be dealing with a battery or charger problem.
3. Change the Batteries
If you’ve been using the shark robot vacuum for a while, then it could be time to get a replacement battery. The rechargeable vacuum battery will lose its ability to hold power with continuous use which shouldn’t come as a surprise to most users.
If you have noticed the battery doesn’t last as long as it used to then it could be time for a change. This typically happens before the battery stops working entirely. You can get a new replacement battery online or buy from other brands that are compatible with the Shark vacuum.
4. Clean the Charger and Battery
You won’t have to jump straight to getting a replacement battery. In fact, the problem could have an even easier fix. A poor connection could be all that is stopping the battery from charging. This could be due to the fact that the charger was not properly plugged in, which you can check immediately. It could also be due to the contacts on the battery and the charge getting blocked by debris. Excessive dirt on the contact could prevent a proper connection and restrict the flow of power.
To fix this, you will have to wipe the charge. Unplug it and use a dry microfiber cloth to clean the areas. Avoid using the regular cotton towel as it might leave too much mint which could pose more problems. Never use a damp cloth for any reason. The water droplets left behind could case escalate the problem and damage to electronic parts.
When wiping the charger and the battery, make sure the contact places are free of dust and then plug it back in. If the indicator light comes up, it means the vacuum is charging.
5. Clean the Vacuum
Cleaning the charger and battery should work but if it doesn’t, then you might want to clean the entire vacuum to see if it helps your situation. A dirty vacuum shouldn’t be a problem when charging but you want to be sure you tried every means possible before replacing the battery. Go ahead to empty all the debris in the canister and rinse it with water. Check for blockages and unclog them using a broomstick or your finger. Ensure the rolling brush in the head of the vacuum is clean.
Once thoroughly cleaned, you can go ahead to leave it plugged in for sixteen hours. This is just about how long it takes to charge the shark robot vacuum. If it doesn’t work after all these, then you might have to take the vacuum to a repair shop to determine the fault.
6. Check Your Warranty
While not likely the case, but it could be possible that this type of problem is covered by your warranty. You might want to give customer support a call and check if they can handle the problem. If so, ensure you do not open or manhandle the vacuum.
Take note that sending the vacuum over to the manufacturer doesn’t mean that it will be fixed immediately. This will take some time but if you want to get straight to using your vacuum, then you can consider the last option below
Last Resort: Get a Replacement
If all fails, then you might be better off with a replacement vacuum. If you have been using your shark robot vacuum for a while and it has served you well, then getting a replacement would be better than going for repairs. You might want to try the local vacuum repair shop first before making the decision on getting a replacement. At the shop, you might be told which parts to replace. If they cost less than getting a replacement option, then by all means go for it. Replacement parts can be bought on the Shark website or Amazon.
When purchasing a replacement part, ensure you stick to the original parts. You should focus on buying from only the Shark website or from trusted dealers on Amazon to avoid purchasing counterfeit or fake parts.


")