Fixing a headphone wire can seem daunting at first, but with the right tools and knowledge, it can be an easy and cost-effective way to extend the life of your favorite headphones. Here is a step-by-step guide on how to fix a headphone wire.
How to Fix Headphone Wire
Step 1: Gather Your Tools
Before you begin, make sure you have all the tools you will need. This includes a wire stripper, electrical tape, soldering iron and solder, heat shrink tubing, and a small flat-head screwdriver.
Step 2: Identify the Issue
The first step in fixing a headphone wire is to identify the problem. Is the wire damaged or frayed? Is there a loose connection at the headphone jack or in-line controls? Once you know the issue, you can determine the best course of action.
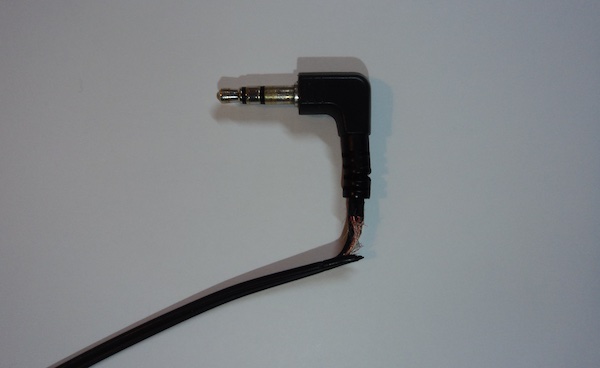
Step 3: Cut and Strip the Wire
If the wire is damaged or frayed, you will need to cut off the damaged section and strip the wire to expose the copper wire inside. Use the wire stripper to carefully cut and strip the wire, taking care not to damage the wire further.
Step 4: Solder the Connection
If the issue is a loose connection, you will need to solder the wire back together. Start by heating up your soldering iron and tinning the tip with a small amount of solder. Then, carefully apply the soldering iron to the loose connection and apply a small amount of solder to secure the connection.
Step 5: Cover the Connection with Heat Shrink Tubing
Once the connection is securely soldered, it’s important to cover it with heat shrink tubing to protect it from further damage. Simply slide the heat shrink tubing over the soldered connection and use a heat gun or lighter to shrink it down and secure it in place.
Step 6: Test the Connection
Once you have completed all the steps, it’s important to test the connection to make sure it is secure. Plug in your headphones and listen to music or a podcast to make sure the headphone is working properly. Check if the audio is distorted. In addition, use the volume control to ensure you’re able to get the desired sound. If everything works fine, then you can enjoy your listening experience.
How to Extend the Headphone Cable
If you love listening to music on your headphones but find that the cable is not long enough, you may be wondering how to extend it. Luckily, it is not difficult to extend a headphone cable, and with a few simple tools and materials, you can easily add extra length to your headphones. We will go over the steps and materials you will need to successfully extend your headphone cable.
Step 1
Before you begin the process of extending your headphone cable, you will need to gather a few materials. These include:
A replacement headphone cable: You can purchase a replacement headphone cable at any electronics store or online. Make sure to choose a cable that is compatible with your headphones and has a length that is longer than your current cable.
Soldering iron: A soldering iron is a tool that is used to melt and join metal together. You will need this to attach the new cable to your existing headphones.
Solder: Solder is a metal alloy that is melted by the soldering iron and used to join metal parts together. Make sure to choose a high-quality solder that is designed for electronic use.
Heat shrink tubing: Heat shrink tubing is a plastic tube that is used to insulate and protect connections. You will need this to cover the soldered connection between the new cable and your headphones.
Wire stripper: A wire stripper is a tool used to remove the protective insulation from the ends of wires. You will need this to expose the bare wire on the ends of the new cable.
Step 2
Cut the headphone extension cable to the desired length. Make sure to cut the cable straight and cleanly to avoid any fraying or damage to the wires.
Step 3
Use the electrical tape to insulate the cut ends of the extension cable. This will protect the wires from any potential damage and ensure a secure connection.
Step 4
Next, strip the outer casing of the headphone cable and extension cable using the scissors. Be careful not to cut any of the wires inside.
Step 5
Once the outer casing has been removed, you will need to identify the wires inside the cables. Most headphone cables have four wires – a red and black wire for the left channel, and a green and blue wire for the right channel.
Step 6
Using the soldering iron, carefully solder the corresponding wires together. For example, the red wire from the headphone cable should be soldered to the red wire on the extension cable. Repeat this process for all four wires.
Step 7
Once all the wires have been soldered together, use the electrical tape to secure the connections and prevent any short circuits.
Step 8
Finally, test the extended headphone cable by plugging it into a device and listening to audio through the headphones. If the sound is clear and free of any static or distortion, then the extension has been successful.
Step 9
If you encounter any issues with the extended cable, such as static or distorted sound, you may need to check the connections and make sure they are secure. You may also need to check the quality of the extension cable and ensure that it is compatible with your headphones.
Wrapping Up
Repairing a headphone wire is a simple and cost-effective way to extend the life of your headphones. By following the steps outlined in this guide, you can easily fix any issues with your headphone wire and avoid the need to replace the entire headset.
Whether you have a loose connection, a frayed wire, or a damaged jack, the techniques discussed here will help you fix the problem and get your headphones working again. With a little patience and attention to detail, you can easily repair your headphone wire and enjoy your music once again.


