Headphone muffs, also known as earpads, are a crucial component of headphones that provide comfort and noise isolation during prolonged listening sessions.
However, over time, these muffs can become dirty and uncomfortable to wear. In this guide, we will go over the steps to properly clean headphone muffs, as well as some tips to prevent them from getting dirty in the first place.
How to Clean Headphone Muffs
Step 1: Gather your materials
Before you begin cleaning your headphone muffs, it’s important to gather all of the materials you’ll need. You’ll want to have a soft cloth, rubbing alcohol, cotton swabs, and a toothbrush on hand.
Step 2: Disconnect your headphones
Make sure to disconnect them from any devices they may be connected to. This will prevent any damage to your bluetooth headphones or devices while you’re cleaning.
Step 3: Remove the muffs from the headphones
Before cleaning your headphone muffs, remove them from the headphones themselves. This will make it easier to access the entire surface area of the muffs and will prevent any water or cleaning solution from damaging the headphones.
To remove the muffs, first locate the points of attachment on the headphones. These are usually small tabs or clips that hold the muffs in place. Gently pry these tabs or clips open using your fingers or a small tool, such as a screwdriver or knife. Once the muffs are free, carefully lift them off the headphones and set them aside.
Step 4: Vacuum the muffs
Before using any cleaning solutions, it is a good idea to remove any loose debris or dirt from the muffs using a vacuum cleaner. This will make it easier to clean the muffs and will prevent any debris from being spread around during the cleaning process.
To vacuum the muffs, simply hold the nozzle of the vacuum over the muffs and turn it on. Move the nozzle in a circular motion to cover the entire surface area of the muffs. Be sure to vacuum both the inside and outside of the muffs, as well as the edges and seams.
Step 5: Apply rubbing alcohol to a soft cloth
Once you have your materials ready, it’s time to start cleaning your headphone muffs. Begin by applying some rubbing alcohol to a soft cloth. The alcohol will help to remove any dirt or grime that may be on your headphone muffs.
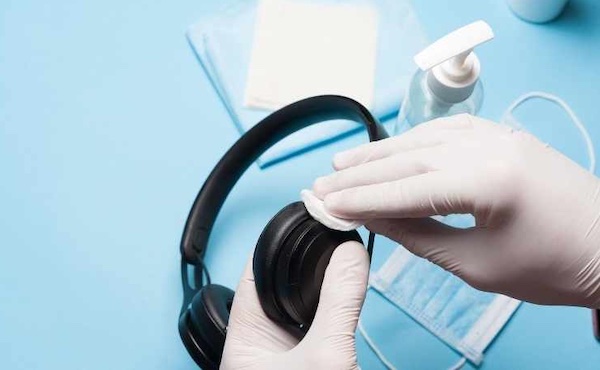
Step 6: Wipe down the outside of the headphone muffs
Using the cloth with rubbing alcohol, gently wipe down the outside of the headphone muffs. Be sure to get into all of the crevices and corners to remove any built-up dirt or grime.
Step 7: Use cotton swabs to clean hard-to-reach areas
Once you’ve wiped down the outside of the headphone muffs, use cotton swabs to clean any hard-to-reach areas. This is especially important for the inside of the muffs, where dirt and grime can easily accumulate.
Step 8: Use a toothbrush to scrub away any stubborn dirt or grime
If you come across any particularly stubborn dirt or grime, use a toothbrush to gently scrub it away. Be sure to use gentle, circular motions to avoid damaging the headphone muffs.
Step 9: Wipe down the headphone muffs with a clean, damp cloth
After you’ve finished cleaning the headphone muffs, use a clean, damp cloth to wipe away any remaining rubbing alcohol or cleaning solution. This will help to prevent any residue from being left behind on your headphone muffs.
Step 10: Allow the headphone muffs to air dry
After you’ve finished cleaning your headphone muffs, allow them to air dry before using them again. This will help to ensure that they are completely clean and ready for use.
Tips on How to Maintain Your Headphone Muffs
Headphone muffs can be prone to getting dirty or accumulating debris. Over time, this can affect the sound quality and comfort of your headphones, and can even lead to damage or other problems. Follow these tips to keep your headphone ear muffs clean, so you can continue to enjoy them for a long time to come.
- Regularly clean the exterior of the headphone muffs: It is important to clean the exterior of the headphone muffs on a regular basis to remove any dirt, grime, or other debris that may have accumulated on the surface. This can be done using a soft, dry cloth to gently wipe the headphone muffs clean.
- Avoid exposing the headphone muffs to moisture and other liquids: Moisture and other liquids can easily damage the headphone muffs, so it is important to avoid exposing them to these elements. If the headphone muffs do come into contact with moisture or other liquids, it is important to remove them immediately and allow them to fully dry before using them again.
- Remove any debris or dirt that may be caught in the headphone muffs: Debris and dirt can easily become trapped in the headphone muffs, so it is important to regularly check for and remove any debris or dirt that may be caught in the headphone muffs. This can be done using a soft, dry cloth to gently remove the debris or dirt.
- Use a gentle, non-abrasive cleaning solution on the headphone muffs: To effectively clean the headphone muffs, it is important to use a gentle, non-abrasive cleaning solution. This will help to remove any dirt, grime, or other debris without damaging the headphone muffs.
- Avoid using harsh chemicals or abrasive materials to clean the headphone muffs: Harsh chemicals and abrasive materials can easily damage the headphone muffs, so it is important to avoid using these when cleaning the headphone muffs. Instead, use a gentle, non-abrasive cleaning solution and a soft, dry cloth to gently clean the headphone muffs.
- Use a soft, dry cloth to gently wipe the headphone muffs clean: To effectively clean the headphone muffs, it is important to use a soft, dry cloth to gently wipe the headphone muffs clean. This will help to remove any dirt, grime, or other debris without damaging the headphone muffs.
- After cleaning the headphone muffs, it is important to allow them to fully dry before using them again. If the headphone muffs are not completely dry, moisture or other liquids may be trapped inside, which can lead to damage or even mold growth. This can affect the sound quality of the headphones and may also cause discomfort or irritation to the ears.

: How to Fix")


