Charging issues can arise in the Puffco Peak One or Peak Pro, especially if you’re one of those users that allow the battery to fully drain before charging it. This could damage the battery to the point that it won’t be able to hold a charge or is unable to complete a normal charge cycle.
Another reason for charging problems is leaving the device on the charger for many hours after it is fully charged. In addition, using a 3rd party charging brick could also be damaged the battery.
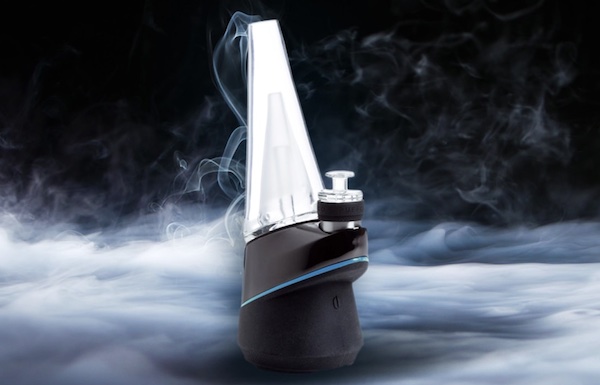
Puffco Peak Not Charging: Causes & How to Fix
In this article, we will reveal all the causes and fixes for Puffco Peak not charging.
Check the Charging Port
You’d want to be careful when cleaning the Puffco Peak, especially when doing so with water. When cleaning the glass with water, you should pat it dry quickly to prevent water from dripping down and entering the charging port. This will cause charging problems that will require you to change the charging port or go for an entirely new device.
If all other fixes won’t work, then it could be that your charging port is damaged for some reason. Inspect the charging port for damage and take it to a repair shop if you find any.
Reset the Device
This fix works if you notice that the base will not charge. Resetting the device will clear any bugs that might have interfered with the software. Simply shut the device down by holding the button for 6 to 20 seconds or until you feel the device vibrate and powered on. After that, try attaching the charger to see if it works.
Switch Chargers
In some cases, the problem could be as simple as a defective USB-C Charger. To confirm, simply switch chargers and check if it works on the device. You might want to check if the USB cable is the problem as well.
How to Clean and Maintain your Puffco Peak
If you want your Puffco Peak to last you a while then you must apply the best and safest maintenance tips. Right here, you will find all the tips and basics of cleaning and maintaining the device that will help to keep it working great.
Tip #1
Always clean the bowl of the Puffco Peak between uses. This is common practice with a traditional rig so nothing should be different. When cleaning the bowl, you won’t have to use alcohol on the swab. You could just swab up the bowl while it is still relatively warm which should get rid of most of the ash and whatever material is in the vape.
However, if you prefer going with an ISO swab, then you should let it cool down before doing so. Using cool ISO against a hot chamber would result in thermal shock and crack the bowl. Ensure that the chamber or atomizer cools down first before you start cleaning.
Tip #2
If you prefer going for ISO for deep cleaning, then you will have to soak the chamber or bowl before that. The frequency with which you do this will depend on your use. It is recommended that whenever you charge the battery, take the chamber off, and check for leakage. If you notice oil flooding out around the connection pin area, then you should prep for deep cleaning.
Tip #3
You will have to soak the chamber in ISO for about 30 minutes and then it out and allow it to dry for another 30 minutes. Avoid heating up the chamber until it is completely air-dried as ISO is flammable. To know if the chamber is completely dry, check if there is a hint of raw alcohol odor left. If you notice any cracking sound when you hit it up, turn the device off quickly.
Tip #4
The silicone area beneath the chamber and the glass is another place that needs to be cleaned with ISO. However, you might want to be extra careful with this area. Avoid getting ISO around the charging port or you might have to worry about charging issues later.
To clean you only need to wipe around the silicone area and the air path port. Simply use the tip of the swab to wipe all of the little ridges in the silicone that holds the chamber. Look for any build-up in this area and wipe it off.
Tip #5
The glass is one of the easiest places to clean in Puffco Peak but it is often ignored. To clean, soak the glass in ISO and rinse it thoroughly with water. Dry the glass by patting it down and ensure there is no water dripping down. If you read the owner’s manual, you will notice that you’re not meant to get any water in the bottom section of the glass. This won’t happen if you avoid overfilling the glass.
Within the glass, you will find an inner core. Inside of that, there is a straw. If the glass is overfilled, water will get into the straw and right into the bottom pocket. Just dump all of the water out to prevent this from happening.
Tip #6
Another maintenance problem for people that haven’t been paying attention to their device is oil leaking into the base and solidifying. If you noticed this, then you should be paying more attention and maintaining your device properly. To get rid of the oil, simply heat the device for one cycle on the coolest setting. This should get the sticky material to loosen up a bit.
Avoid pulling it off before heating it as you will likely pull out one of the connection pins. When heated, you should be able to get out the sticky stuff. If you find that the connection pan is flooded, you could just use a cotton swab to get it out. While you might want to deep clean, do not pour ISO into that connection pan.
Tip #7
The Peak One atomizer features an open system design that allows users to swap out their bowls whenever they feel like it. This offers convenience, however, it does come with a problem. The more you take it apart, the more you’re prone to breaking it. When it comes to the atomizer, you should avoid disassembling it. If you have to do so, clean it first by soaking it in ISO while it is fully assembled. Ensure it dries completely before using it.
Tip #8
When it comes to choosing an ISO that will clean the device properly without causing any damage, you should go for an ISO that is 90% or higher. This reduces the water content which should prevent long-term water damage while cleaning. While you might be covered by your warranty, getting the right ISO will save you a lot of time.


")
