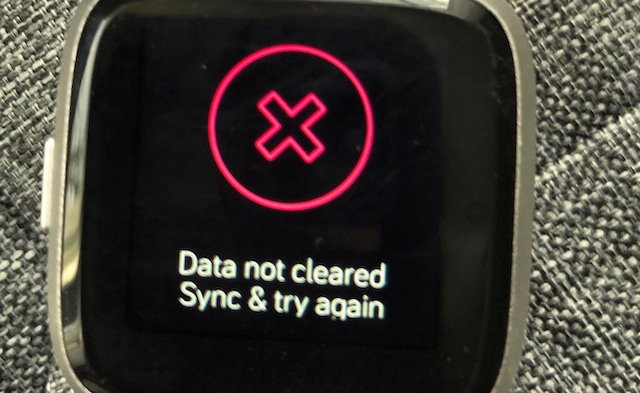
Fitbit Versa 2 data not cleared sync and try again is an error message that many Fitbit users are used to. Luckily, this is not a problem that is without a solution.
In this article, we’ve shared the steps to follow to fix Fitbit Versa 2 Data Not Cleared Sync and Try Again.
Fitbit Versa 2 Data Not Cleared Sync and Try Again: How to Fix
1. Remove Fitbit from the Fitbit app
To fix this issue, remove your Versa from the Fitbit app:
- Open the Fitbit app
- Navigate to the Today tab, then tap the profile icon or picture at the top
- Select the name of your Fitbit Versa device
- If you use an Apple device, scroll down and select “Remove and confirm”. But if you use an Android device, tap the trash can and confirm you want to remove and unpair your Versa
- Navigate to your Versa’s Bluetooth settings and check if it is listed among the connected devices. If it is, select the option to “forget” the device.
2. Change your Fitbit Versa’s clock face
Another way to get your Watch and Fitbit app to sync is to temporarily change your device’s clockface. This helps to refresh the connection.
To change your Versa’s clock face
- Open the Fitbit app on the mobile device paired to your Fitbit Versa
- Tap the Today tab, and then your profile picture or icon at the top
- Choose your Versa from the account list
- Tap “clock faces”
- Select “All Clocks” and choose a new clockface from the options
- Install the selected clock face and set the permissions
- Wait until the clockface downloads to your Versa. Once this is complete, tap your Versa’s screen and see if you can navigate without seeing the “data not cleared” error message.
3. Re-pair your Fitbit to your phone’s Bluetooth
- Navigate to Settings > Bluetooth to open the Bluetooth settings on your phone.
- From the list of connected Bluetooth devices, select your Versa.
- Select the option to “Forget” this device. This will unpair your Fitbit Versa from your phone’s Bluetooth connection.
- Do not attempt re-pairing your Fitbit through your phone’s Bluetooth settings. Instead, do that through the Fitbit app if you want the pairing process to work correctly.
- Open the Fitbit app on your mobile device.
- Tap your profile picture or icon and choose from the Fitbit device
- YOU will receive a notification to start the Bluetooth pairing process and follow the directions to set this up again.
- If you don’t get a notification, tap the Notification settings in the Fitbit app to commence the pairing process.
- After successfully re-pairing via Bluetooth, wait until your device automatically syncs with the Fitbit app or simply tap Sync Now to initiate the syncing process.
4. Clear your Bluetooth cache
If you’re pairing your Fitbit Versa with an Android device, use the additional Bluetooth feature to clear only the Bluetooth cache.
To do this:
- Navigate to Settings > Apps & Notifications (or just “Apps”)
- Show all your apps
- Tap the Menu or More button (appears as three dots or three lines)
- Select Show System apps
- From the list, select and tap Bluetooth.
- Select Storage & cache
- Tap “Clear cache”.
5. Remove your Fitbit from the Fitbit app and add it back
Another way to solve the “data not cleared; sync and try again” problem on your Fitbit Versa is to remove your Versa from the app and re-add it. To do that, follow these steps:
- Open the Fitbit app on your paired mobile device
- Tap on the Today tab and tap on your profile icon or picture
- Select your Fitbit Versa from the list displayed
- Scroll down, tap Remove, and confirm. If you’re using an Android device, tap trash can, and confirm.
- Open Bluetooth settings on your mobile device. If your Versa is listed, select the option to “forget” it.
- Ensure that your Fitbit Versa is no longer connected to your devices
- Then Restart your mobile device
- Connect your Fitbit Versa to its charger and start charging it
- Open the Fitbit app, then navigate to Today > profile picture or icon
- Tap the option to “Set up a Device”
- Set up and pair your Fitbit and try to see if the data error message shows up
FAQs
How do I clear and reset Fitbit?
Clearing and resetting your Fitbit is very easy. Keep in mind that doing this will clear your information and all your settings. To do this on your Fitbit tracker, swipe over to the “Settings” menu. Locate the ‘About’ tap and press it.
Scroll until you reach the section labeled “Factory Reset”. This section could also be labeled “Clear User Data”. You will be asked to confirm whether you wish to erase your Fitbit’s factory settings. Confirm the request to clear and reset your Fitbit.
How do I factory reset my Fitbit without a phone?
If you have a Fitbit app on your computer, you can also reset the Fitbit Versa straight off that device. You will have to make sure your Fitbit is connected to the computer and has a full battery. Then open the Fitbit app and select the “Devices” tab. Select your Versa and tap the “Reset” button.
How do I clear My Fitbit for a new user?
If you’re using a Charge 3, Charge 4, Iconic, or Versa tracker, you can follow these simple steps to clear your Fitbit for a new user. Go to Settings > About > Factory Reset or Clear User Data. For Ace 2 or Inspire, go to Settings > Clear User Data.
Why is the Sync Icon and what does it do?
The sync icon on your phone means that the device is successfully connected to a computer or other device, and it is syncing data with the connected device. The sync icon is also used to update the content on your device with the latest changes made online.
If you wish to turn off the sync icon, open the Settings app and go to Accounts > Sync. From there, you can disable the sync for any account you won’t want to see the sync icon.
![Apple Watch Keeps Locking and Asking for Password [FIXED]](https://techrene.com/wp-content/uploads/2022/01/apple-watch-keeps-locking-211x150.jpg "Apple Watch Keeps Locking and Asking for Password [FIXED]")


