Having a Fitbit Charge presents you with an array of possibilities. From tracking your health to keeping you productive and, most of all, checking the time. There are times when your Fitbit Charge doesn’t show the correct time. This could be a result of switching time zones or your device not syncing with the mobile app.
The question that begs an answer is, “can you change the time of your Fitbit Charge?” Of course, you can. This post will show you how to change the time of Fitbit Charge 3 or 4 in different ways. Grab a seat and let’s dive straight in.
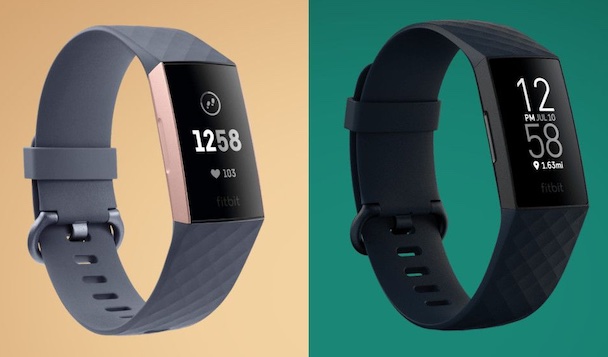
How to Change Time of Fitbit Charge 3 & 4
Usually, your Fitbit Charge should sync with the app on your smartphone. This way, it keeps up with the time when you switch time zones since the time on your smartphone is always correct. If you switch off the internet connection on your smartphone, then the Fitbit Charge will no longer sync. As a result, it may still reflect the time from your previous time zone.
When this happens, you need to switch on your internet to sync both devices. Alternatively, you can set the time manually through the Fitbit app. This section will show you how to achieve both.
How to Change Time on Fitbit Charge 3 & 4 via Smartphone
If you will like to change the time of your Fitbit Charge using your smartphone, the steps here will work for you. Note that the steps are similar for both Android and iOS devices. Check the steps out below:
Step 1: Launch the “Fitbit” app on your smart device.
Step 2: Go to the top-right corner of the screen and tap on the tab labeled “Today.” Note that sometimes, this tab may be located in the top-left corner depending on the version of the app you are using.
Step 3: Check for your “Profile Picture” and tap on it to continue.
Step 4: Your action in “Step 3” will reveal a list of menu options. Scroll through the list and select “App Settings.”
Step 5: Your action above should reveal a new menu page showing a series of options. Select “Automatic Time Zone.”
Step 6: Tap on “Select Time Zone” then check for the correct time for your location.
Step 7: Once you are done choosing the time for your location, scroll to the base of the page and tap on “Sync.”
After taking these steps, the time on your Fitbit Charge 3 or 4 should be correct. What if you don’t have the app on your smart device? You can carry out the process via your computer. Check the next section to find out how.
How to Change Time on Fitbit Charge 3 & 4 via the Desktop App
Fitbit understands that you may not have your smart device available all the time. As such, it has made provision for you to access your Fitbit dashboard via the desktop app on your PC. Just in case you are thinking that the process is difficult, it isn’t. It is as straightforward as the one discussed above for changing the time of your Fitbit Charge using a smart device. Without further ado, check the steps below to figure out how to change the time of Fitbit Charge 3 and 4 on the computer:
Step 1: Launch the Fitbit desktop app on your computer.
Step 2: Provide the appropriate account details to log into your Fitbit account if you aren’t already logged in.
Step 3: Go to the top-right corner of the window and click the “Account” icon.
Step 4: Scroll through the list of menu options and select “Advanced Settings.”
Step 5: Check for the “Auto” option then switch it off if it is switched on. If it isn’t, jump to the next step.
Step 6: Set the time based on the current time zone you find yourself in.
Step 7: After setting the time, scroll to the base of the window and click on “Sync.”
The time on your Fitbit Charge 3 or 4 should sync with your current time zone after taking these steps. There is one more way to change the time on your Fitbit. Check the next section.
How to Change Time of Fitbit Charge 3 & 4 via a PC
This is the final method we will discuss regarding changing the time of your Fitbit Charge manually. In this case, you don’t need to access your dashboard using the Fitbit app. All you need is to access your dashboard via the web browser and complete the necessary processes. Check the steps below to understand what you should do:
Step 1: Launch your favorite web browser on your computer and type “fitbit.com” in the address bar.
Step 2: Provide the appropriate account details to log into your Fitbit account.
Step 3: Once you log in, you should see your dashboard. Go to the top-right of the window and click on the “Gear” icon.
Step 4: Scroll through the list of options then click on “Settings” then select “Personal Information.”
Step 5: Scroll through the menu list on the next page and select “Advanced Settings” then select “Time zone” from the list of options available.
Step 6: Change the time to suit your current time zone.
Step 7: Click on “Submit” at the bottom of the page.
Step 8: Click on “Sync.”
After doing this, the data on your dashboard syncs with the data on the Fitbit Charge. This way, the time changes and you should have the time in your location on the device.
How to Change between 12-Hour and 24-Hour Clock Formats on Fitbit Charge 3 & 4
Would you like to switch between 12-hour and 24-hour clock formats on your Fitbit Charge 3 or 4? The steps below should guide you:
Step 1: Log into your account via your web browser. Note that the only way to complete this process is via the web browser.
Step 2: Click on the “Gear” icon located in the top right of the window.
Step 3: Scroll through the list of options and select “Personal Info.”
Step 4: Go to ‘Advanced Settings” then click on “Clock Display Time.” Choose between 12-hour and 24-hour clocks in this section.
Step 5: Click “Submit.”


